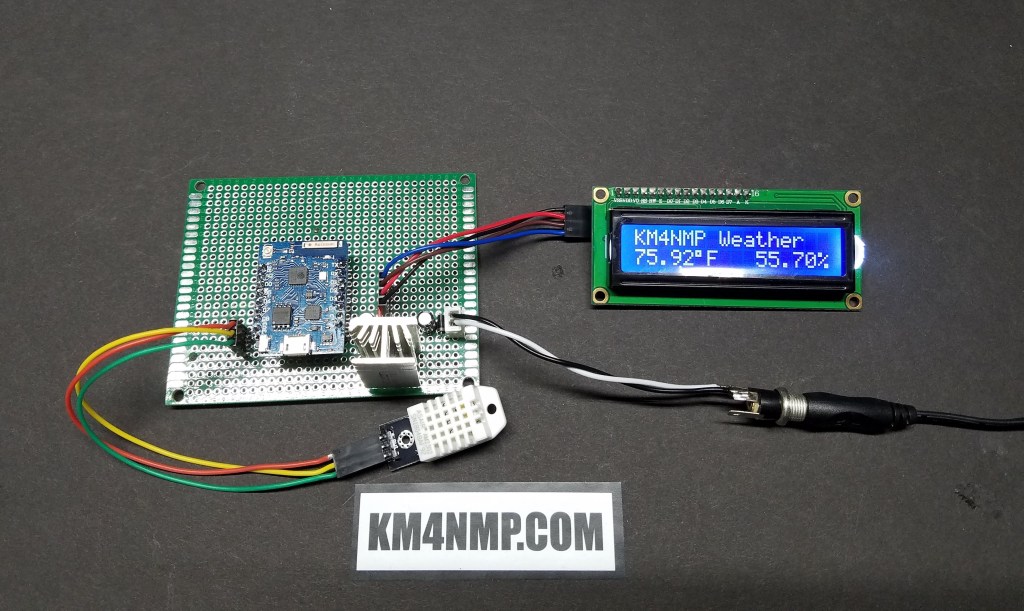
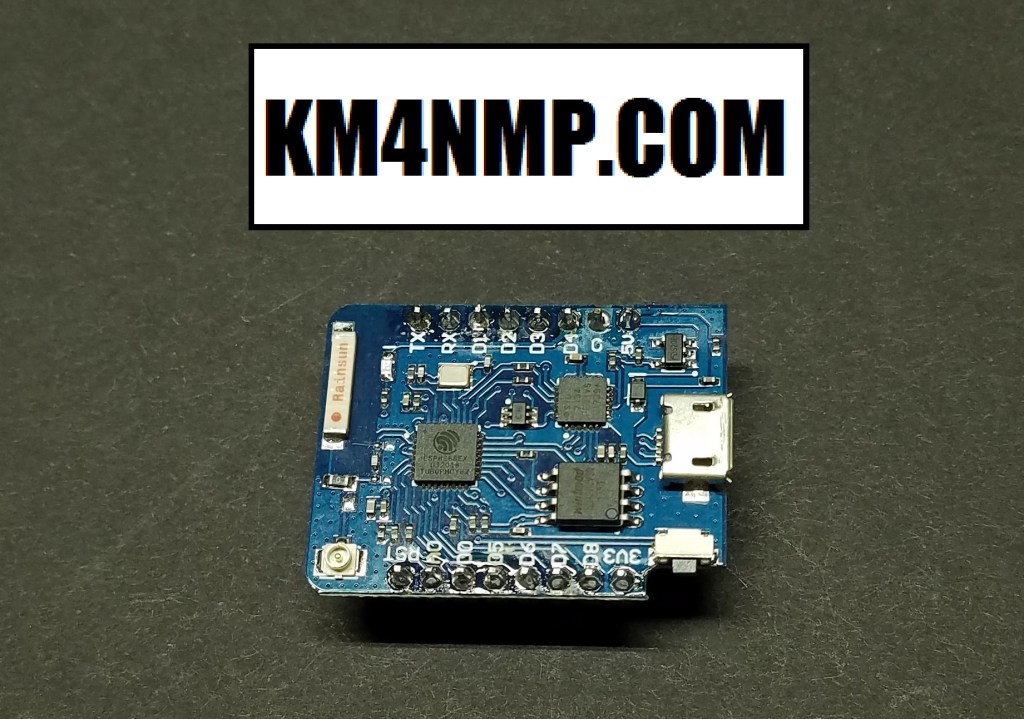
About a month ago, I was given a D1 Mini pro. The D1 is similar to the Arduino boards but is much smaller and has built in WiFi. Since the package is smaller it has 11 I/O compared to the UNO’s 20 I/O. For my first build with the D1, I decided to build a basic weather station.
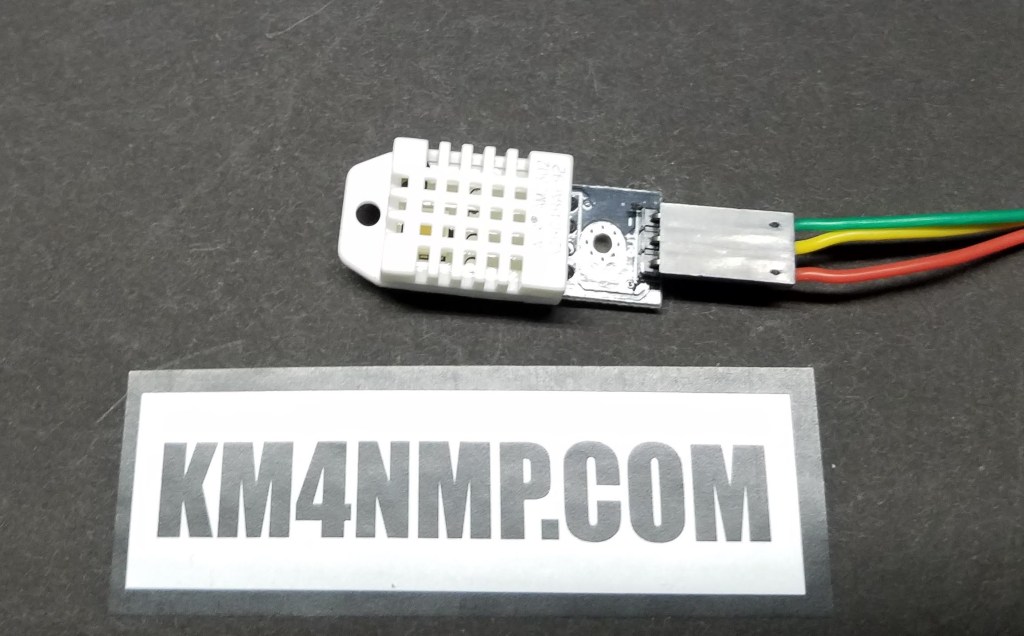
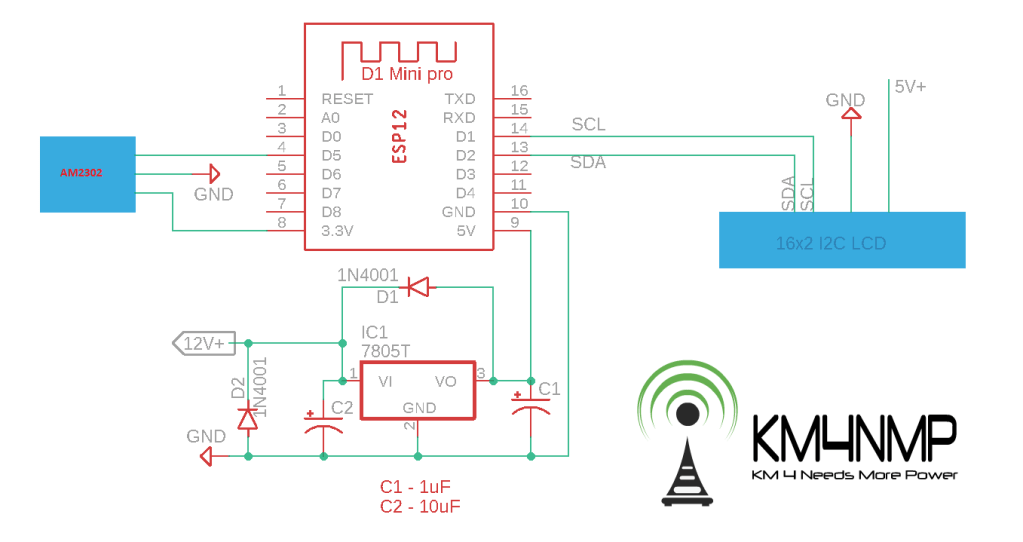
The AM2302 is used for the temperature and humidity sensor. To display the readings, a 16×2 LCD screen will be installed. A 7805 5 volt regulator will power the weather station. This gives us the capability of using a plug in 12 volt supply or a battery connected to a solar panel.
Libraries used are notated in the sketch and there are links at the bottom of the page. While installing the library for the I2C LCD, be sure to follow instructions given on the page. If you do not, while compiling, there will be errors.
Basic Weather Station Sketch
//Basic Weather Station Using D1 Mini pro 10/13/19
//https://KM4NMP.com/
//For the I2C LCD library used and installation instructions use link below
//https://randomnerdtutorials.com/esp32-esp8266-i2c-lcd-arduino-ide/
//For the DHTesp Library use link below
//https://github.com/beegee-tokyo/DHTesp/archive/master.zip


#include "DHTesp.h"
#include <LiquidCrystal_I2C.h>


int lcdColumns = 16;
int lcdRows = 2;
bool state=0;
unsigned long previousMillis = 0;
const long interval = 2000;


LiquidCrystal_I2C lcd(0x27, lcdColumns, lcdRows);

DHTesp dht;
void setup() {


  dht.setup(14, DHTesp::DHT22);
  lcd.init();
  lcd.backlight();
  lcd.setCursor(0, 0);
  lcd.print("KM4NMP Weather");

}

void loop() {
  unsigned long currentMillis = millis();


  if (currentMillis - previousMillis >= interval){ //checks time elapsed since last read
    float h = dht.getHumidity();                   //get humidity
    float t = dht.getTemperature();                //get temperature
    float f = t*9/5+32;                            //change temp to F
    lcd.setCursor(0, 1);
    lcd.print(f);                                  //prints temp
    lcd.print((char)223);                          //charecter for derees
    lcd.print("F   ");
    lcd.print(h);                                  //prints humidity
    lcd.print((char)37);                           //speacial charecter for%
    previousMillis = currentMillis;                // resets time of last read
  }


}

All the connections were made on a 7cm x 9cm prototype board. This will give me plenty of room to add sensors and other accessories. A barometric pressure sensor will be the next addition.
Links
https://km4nmp.com/2019/05/11/lm7805-regulated-5-volts/
https://wiki.wemos.cc/products:d1:d1_mini_pro
https://github.com/beegee-tokyo/DHTesp/archive/master.zip
How to Use I2C LCD with ESP32 on Arduino IDE (ESP8266 compatible)
http://www.learnabout-electronics.org/PSU/psu23.php
Latest Posts
- 2:1 Balun For 2m/6m
- 1:1 Choke For 2m and 6m
- 2m Delta Loop Ver 2
- 2m Delta Loop
- Finishing The 6m Delta Loop With 2:1 Balun


3 thoughts on “Basic Weather Station Using a D1 Mini Pro”