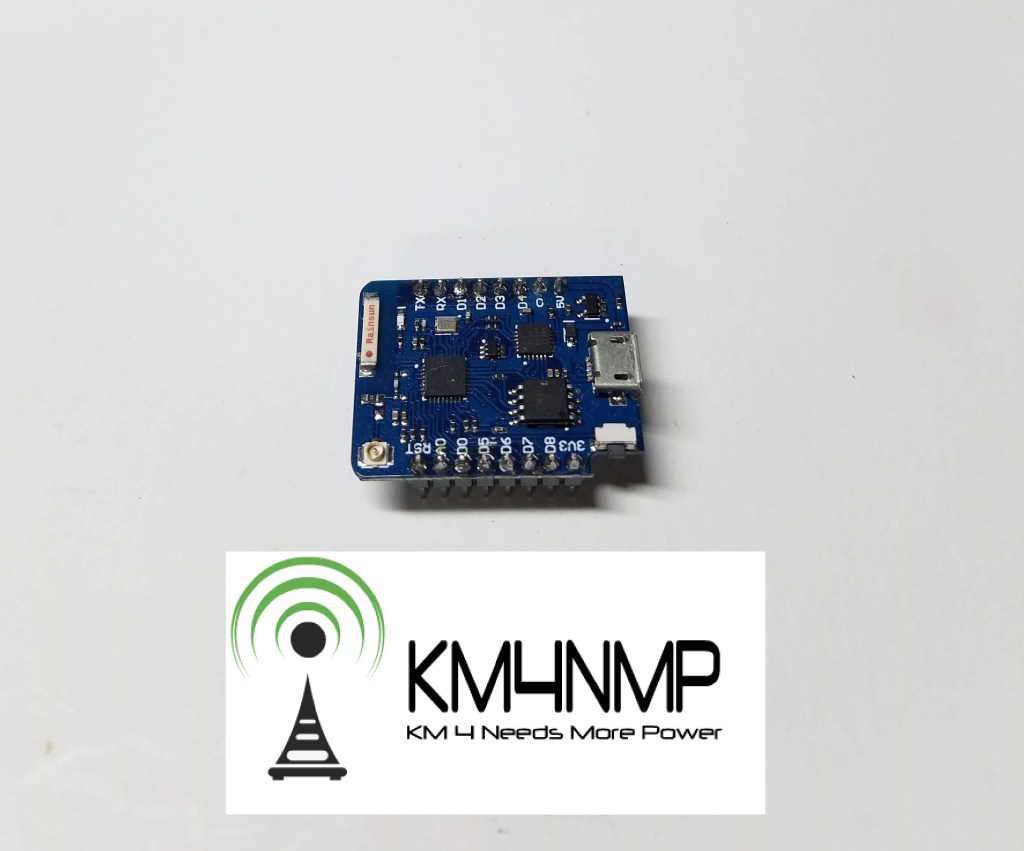
The ESP8266 boards are economical and compact. In several posts, I have used the D1 Mini Pro as the mainboard. If your project is going to connect to your network or the internet, the D1 Mini Pro is a great choice. They have built-in Wifi and are very small. Use the Arduino IDE to program the ESP8266 boards. The IDE needs some additions to be capable of communicating.

First, click on File and Preferences.

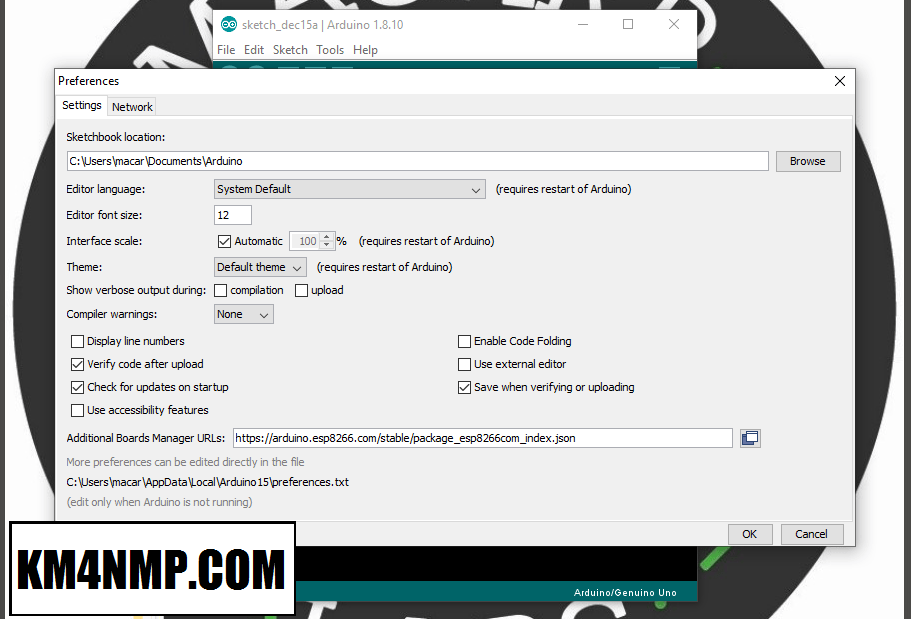
Beside “Additional Boards Manager URLs” add the URL https://arduino.esp8266.com/stable/package_esp8266com_index.json then click OK.

Under Tools, navigate to Board then Board Manager.
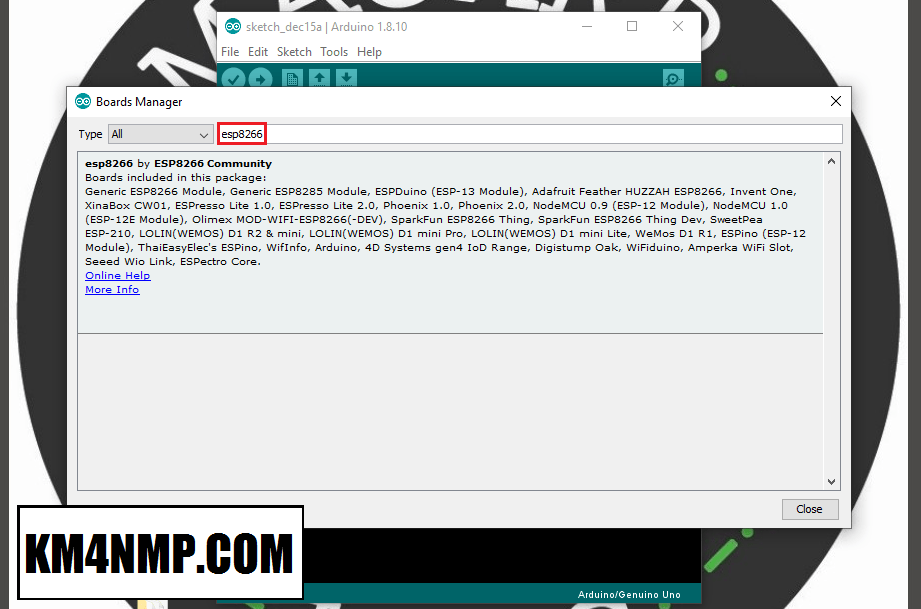
Type esp8266 in the search bar. When the board manager gets done searching, click on the install button. After installation is complete, close the IDE and reopen it.
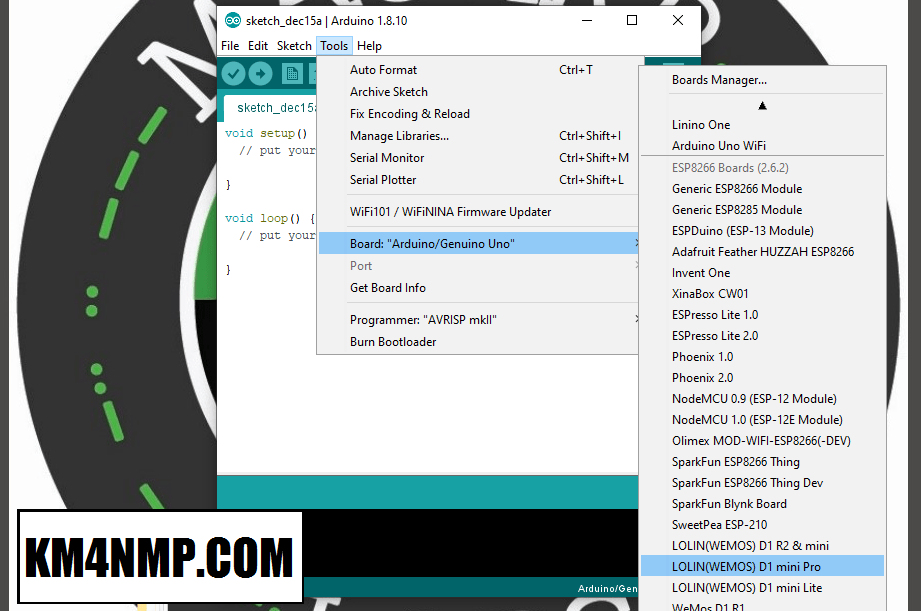
The IDE is now ready for the ESP8266 boards. Go to Tools and Board. Scroll down the list and you see the boards listed. Select the board you are using and have fun.

Links
https://km4nmp.com/2019/10/13/basic-weather-station-using-a-d1-mini-pro/
https://wiki.wemos.cc/products:d1:d1_mini_pro
https://github.com/esp8266/Arduino
Latest Posts
- 2:1 Balun For 2m/6m
- 1:1 Choke For 2m and 6m
- 2m Delta Loop Ver 2
- 2m Delta Loop
- Finishing The 6m Delta Loop With 2:1 Balun

