
Today we will construct a 2m dipole using the DK7ZB match. This matching system is pretty simple to build. Basically, Two pieces of 75 ohm coax are cut to 1/4 wave length and connected between the antenna and the feed line. For this project, I will be using RG-6 Quad shield.
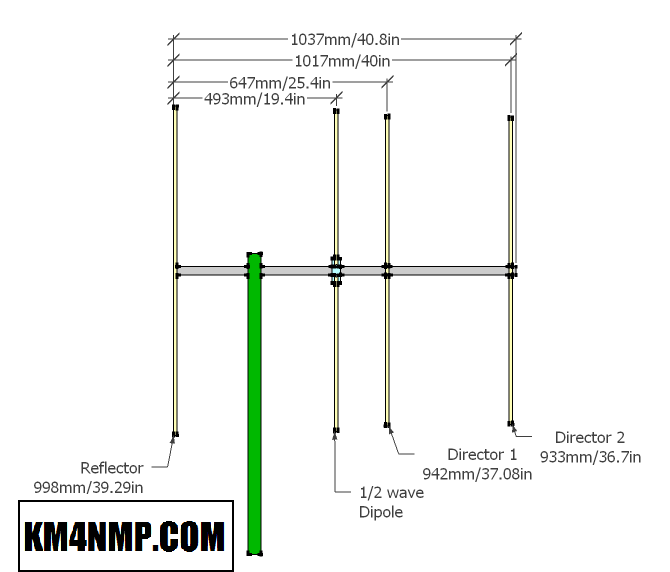

The screw holes for the dipole are sized to install threaded inserts. This should make a strong connection and prevent the treads from striping. The length of the radiating elements were calculated using an online calculator.
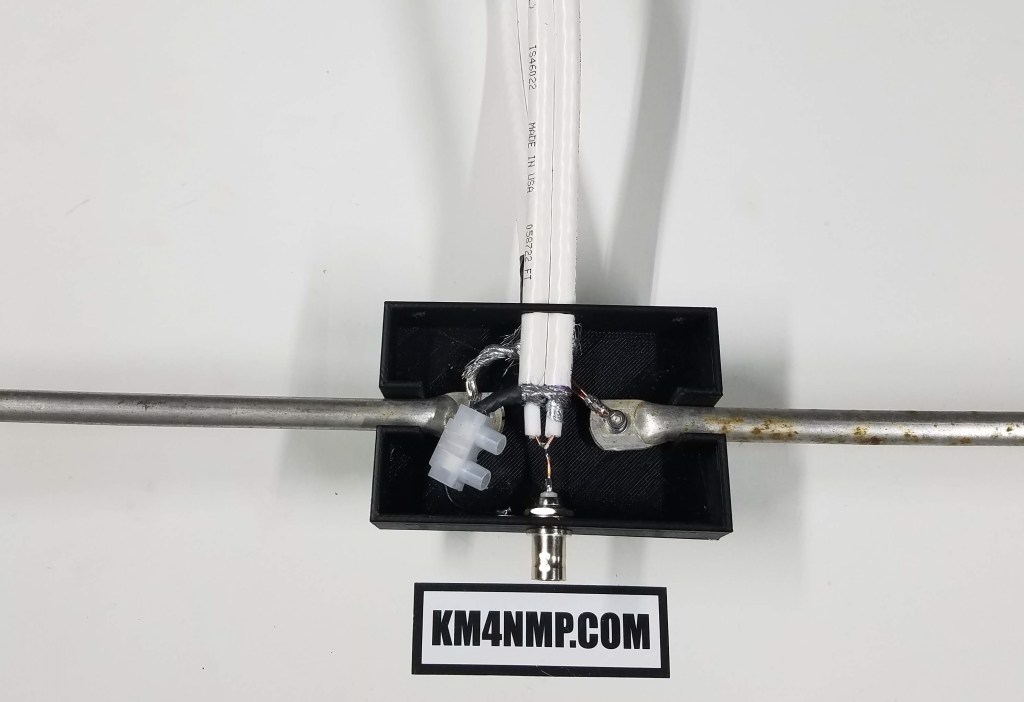
The RG-6 used would not accept solder on the outer braid. On the radiating element side, a ring terminal is crimped to the outer braid. The BNC connector side has a small jumper soldered to the connector and connected to the braid with a piece of terminal strip.

Make sure the coax in the matching runs parallel to each other.


The new Dipole was easily installed on the boom. Before mounting back on to the testing mast, a small piece of of aluminum and a second u-bolt will be added. Once this is added and the antenna tuned, another post will be made.
Links
https://www.qsl.net/dk7zb/dk7zb-match.htm
http://www.westmountainradio.com/antenna_calculator.php
Building the 146 Mhz Yagi Dipole Test Setup
146 Mhz Yagi Dipole Testing Setup
https://www.changpuak.ch/electronics/yagi_uda_antenna_DL6WU.php
Latest Posts
- 2:1 Balun For 2m/6m
- 1:1 Choke For 2m and 6m
- 2m Delta Loop Ver 2
- 2m Delta Loop
- Finishing The 6m Delta Loop With 2:1 Balun

