Since we finished the case to the uBITX, it’s time to interface the new 3.2″ Touch screen. This turned out much easier than I originally thought. With a quick search I found a website by KD8CEC. His sight has all the information and links to files needed to do the integration. After going over the website it was a breeze to setup.
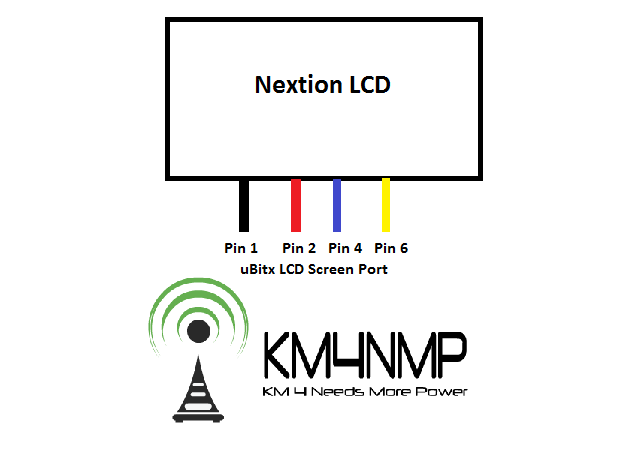
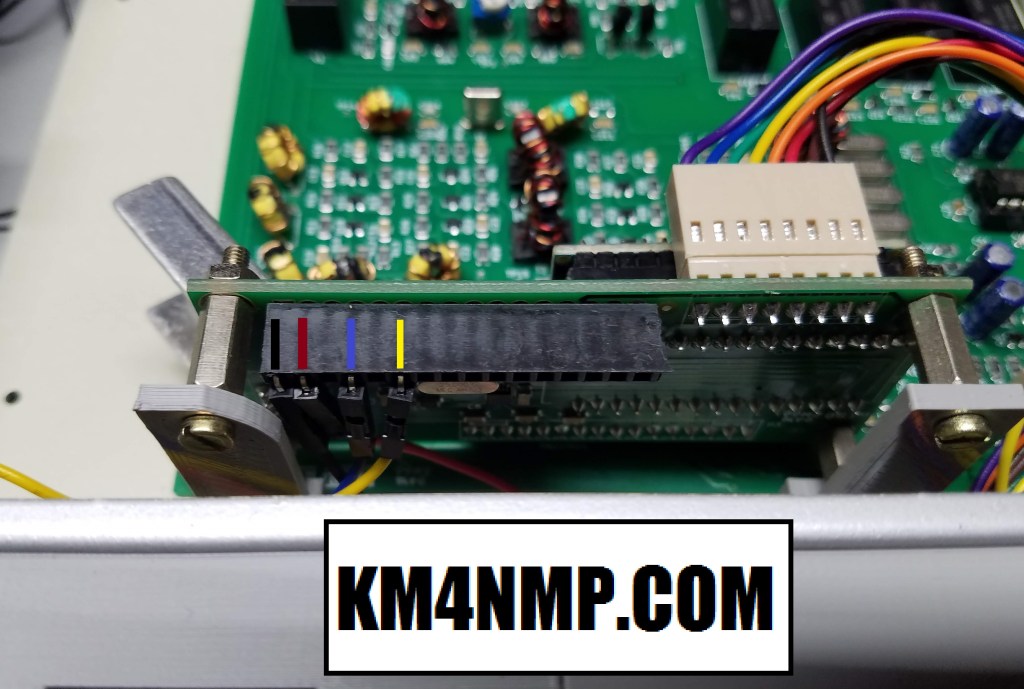
To connect the Nextion Touch screen, remove the original LCD screen. The new screen will use 4 of the pins from the old screens port. The picture above shows what pin each wire from the Nextion needs to be terminated to. Below is a picture of the LCD port with the Nextion connected. To make it easier to see, a colored stripe was drawn above each connection.
The Firmware used in the uBITX and Nextion was downloaded using links from KD8CEC’s website. The files used were not modified. To make it easy the hex file was used to load the uBITX. For the Nextion, the TFT file was copied to a SD card. When you insert the SD card and turn on the Nextion, it will start to install the file. Once it stated it was done on the screen the SD card was removed and the transceiver rebooted.

After the unit rebooted the display came up and synced with the uBITX. The GUI is very intuitive. All the standard settings are available in the GUI. Only basic testing has been done so far.
This project has been fun and I have decided to get my own uBITX . There are many mods and customization’s that can be done. Once mine arrives, I for see many more posts about the uBITX.
Links
https://km4nmp.com/2019/10/05/installing-a-ubitx-in-a-case/
http://www.hamskey.com/2018/06/ubitx-with-nextion-lcd-cec-firmware.html
http://www.hamskey.com/2018/01/how-to-upgrade-ubitx-firmware.html
Latest Posts
- 2:1 Balun For 2m/6m
- 1:1 Choke For 2m and 6m
- 2m Delta Loop Ver 2
- 2m Delta Loop
- Finishing The 6m Delta Loop With 2:1 Balun


2 thoughts on “uBITX 3.2″ Touch Screen”