
Last week we went over how to build the 555 practice oscillator. This was a very reliable chip; but, 50 years later, we have many more options. This week we will be building the Arduino Morse Code Practice Oscillator. The Arduino being used in this project is the Arduino UNO. Building the oscillator with the Arduino is just as easy as the 555; but, it has to be programed after construction is complete.
Programing is simple. It requires the Arduino programing software to be installed on your computer. The program can be copied and pasted into the arduino software. There is a spot notated in the program for note/pitch. This value can be changed to vary the note that is played when the key is pressed.


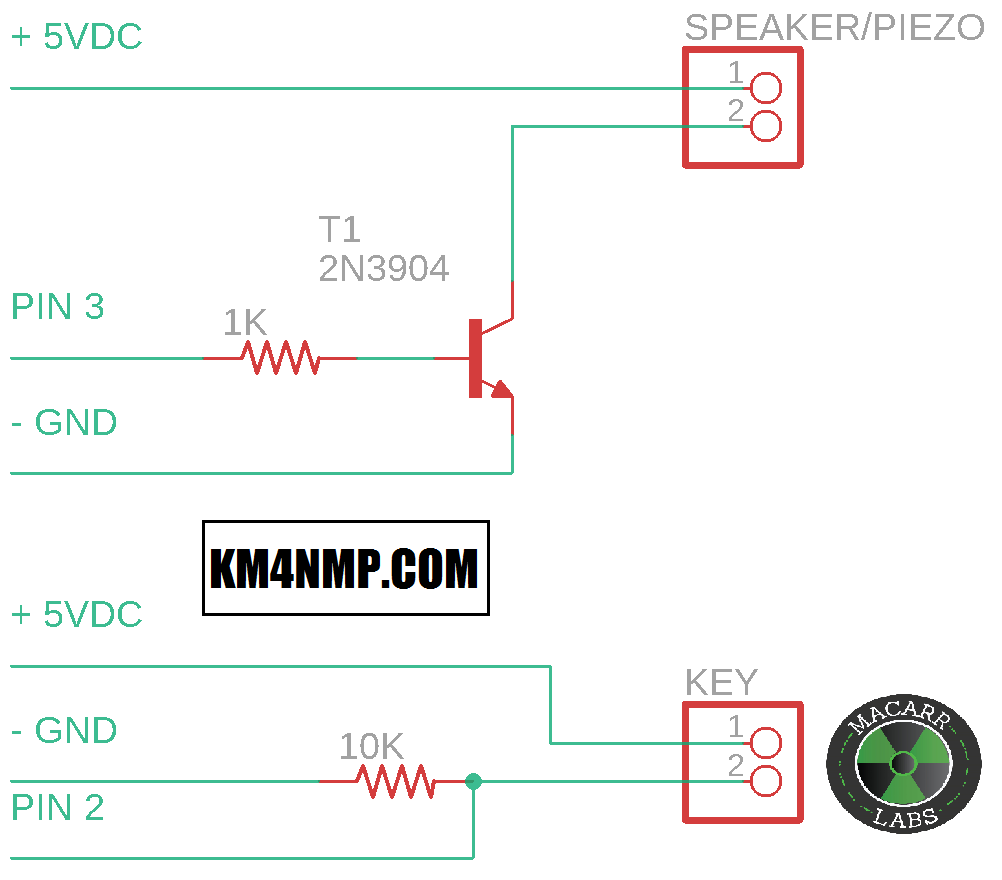
We will be using Pin 2 for our key and Pin 3 for or piezo or speaker. For this example, I am using a piezo but a speaker sounds much better. When this is permanently mounted pins will be used for a speaker connector. This project will also be expanded in future posts.
Arduino Code
const int keyPin = 2; // the number of the straight key pin
int audio3 = 3; // output on pin 3
int note = 587; // oscillator note/pitch
// variables will change:
int buttonState = 0; // variable for reading if key is pressed
void setup() {
// initialize the keyPin pin as an input:
pinMode(keyPin, INPUT);
}
void loop() {
// read the state of the keyPin value:
buttonState = digitalRead(keyPin);
// check if the pushbutton is pressed. If it is, the buttonState is HIGH:
if (buttonState == HIGH) {
// turn Speaker on:
tone(audio3, note);
} else {
// turn Speaker off:
noTone(audio3);
}
}

https://km4nmp.com/2019/03/24/555-morse-code-practice-oscillator/
https://www.arduino.cc/en/Tutorial/toneMelody
https://www.arduino.cc/reference/en/language/functions/advanced-io/tone/
https://www.tutorialspoint.com/arduino/arduino_tone_library.htm
Latest Posts
- 2:1 Balun For 2m/6m
- 1:1 Choke For 2m and 6m
- 2m Delta Loop Ver 2
- 2m Delta Loop
- Finishing The 6m Delta Loop With 2:1 Balun


3 thoughts on “Arduino Morse Code Practice Oscillator Project”