
Overclocking is an easy way to squeeze a little extra power out of the Raspberry Pi. As long as you do not push it to much, this will not void the warranty of the Pi. Before we overclock, it is necessary to have a good cooling system and power supply.
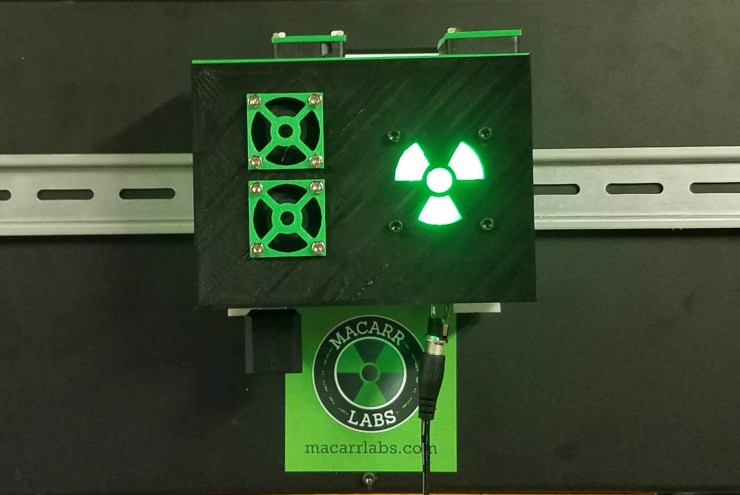
The Raspberry Pi 4 B used in this post, is what I call the Pi6100. Heat sinks have been installed on all the chips of the pi. The case has 3 fans cooling the Raspberry Pi 4. The 4th fan on the case is to pull heat off the power supply. A LM338 power regulator is used in the power supply and is capable of up a 5 amp draw. A large heat sink is installed on the LM338 to dissipate the heat generated. My post on the LM338 has the build and connection of the power supply.
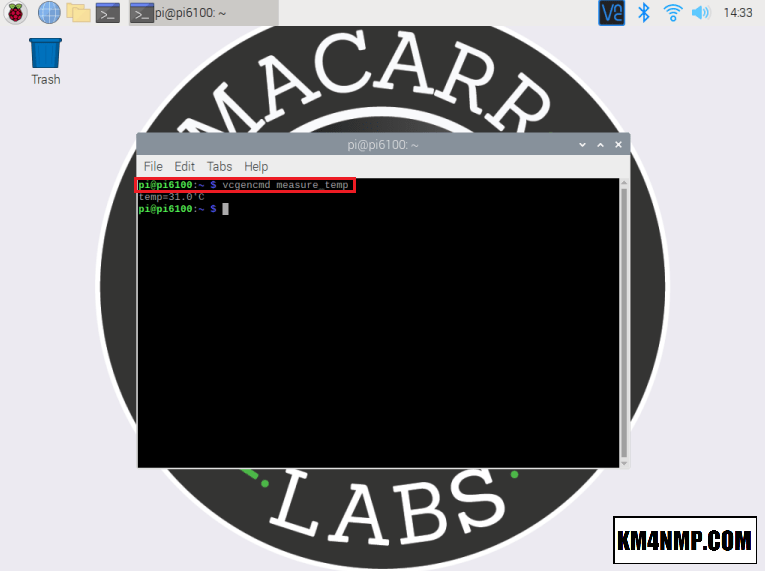
Before overclocking, I like to get a bench mark of the temperature of the Raspberry Pi. In the command line Type ” vcgencmd measure_temp “.
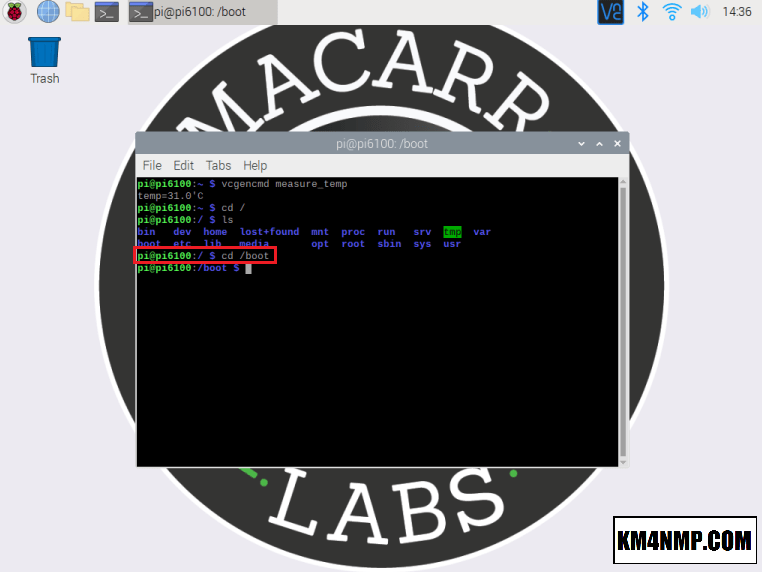
Navigate to the boot directory in the command line.
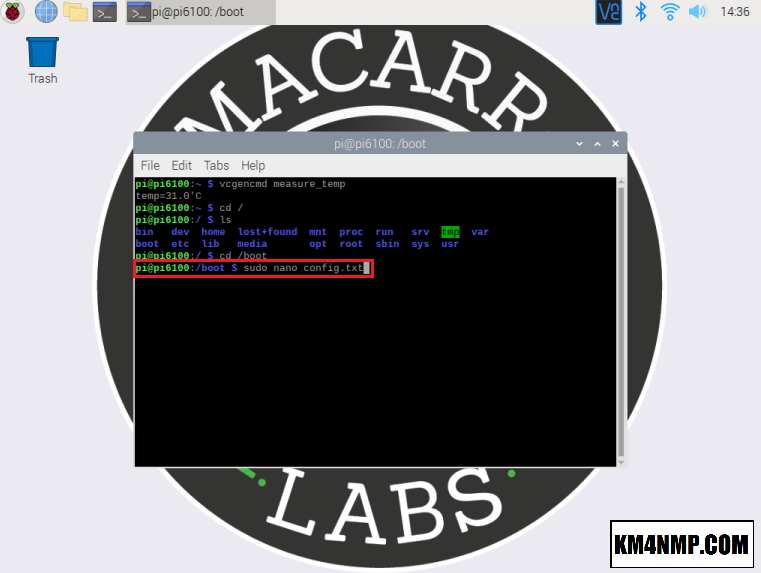
The config.txt file needs to be edited to overclock the Raspberry Pi. To edit this file, type “sudo nano config.txt”.

This will open config.txt in the Nano file editor.
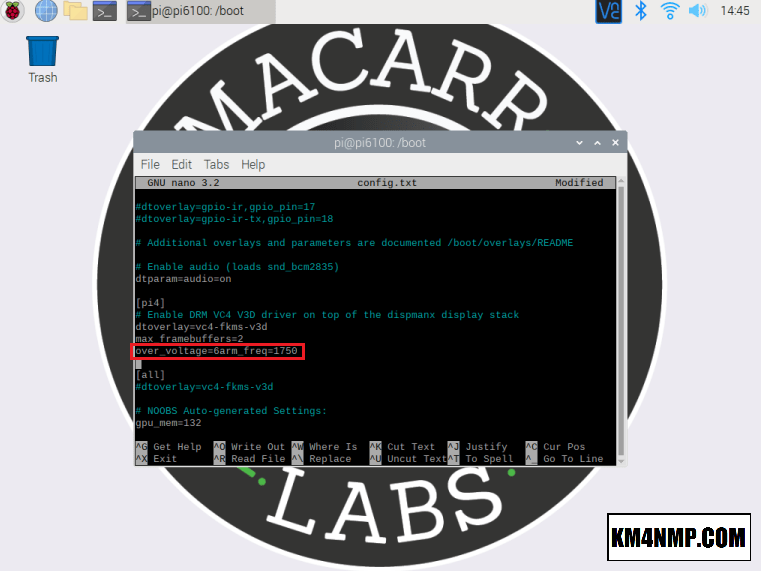
Near the bottom of the file, you will see an area (pi4). We need to add a line that has “over_voltage=6arm_freq=1750”. over_voltage=6 is the maximum allowed without voiding the Raspberry Pi warranty. If you are not overclocking the GPU of the Raspberry Pi, then you can set this number to 2.

To over clock the GPU, add the line “gpu_freq=600”. I like to add a little memory for the GPU. Change gpu_mem from 132 to 256.
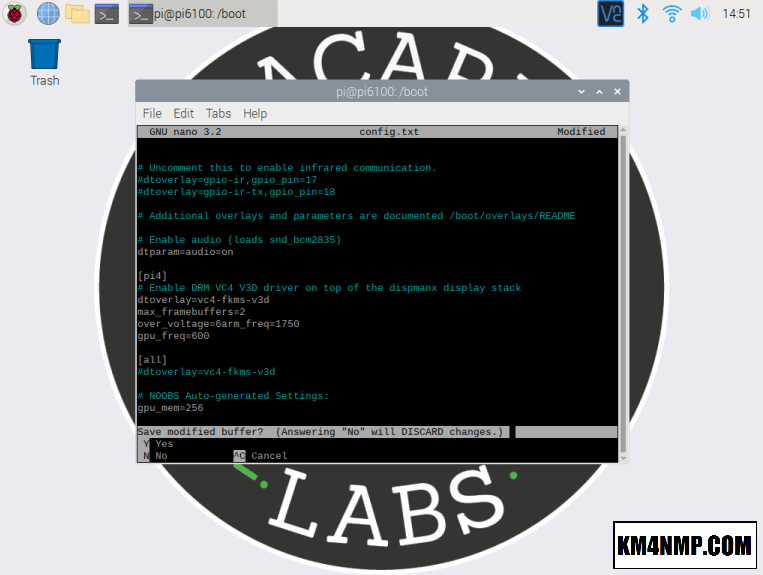
After editing the file press “ctrl x”. Press “y” to save.

Once the file is saved, reboot the Raspberry Pi. The Pi should boot like normal. If it does not boot properly, power the Pi down and hold the shift key while it boots. This will boot Raspian into a recovery mode that allows you to edit the config.txt file.
After the reboot, check the temperature of your Raspberry Pi in with the command “vcgencmd measure_temp”. If no programs are running, it should be a couple degrees higher than the original benchmark taken. You can use an online CPU stress test to put the Pi under a load. The max temperature of the Raspberry Pi is 80 degrees Celsius. If the Pi goes above that, a picture of a thermometer will be displayed in the top right corner of the screen. At 82 degrees Celsius, the Raspberry Pi will throttle itself.
While you are testing, if you see a lighting bolt in the top right corner of the screen, there is an issue with power. Typically this means the voltage is dipping below 5 volts. If you are using the USB-C to power the Pi, use as short of cable as possible. Make sure the power brick is good quality and provides at least 3 amps.
Links
https://cpux.net/cpu-stress-test-online
Power for the Raspberry Pi 4 using the LM338 Power Regulator.
The Raspberry Pi 4
Backing up the Raspberry Pi SD card.
Latest Posts
- 2:1 Balun For 2m/6m
- 1:1 Choke For 2m and 6m
- 2m Delta Loop Ver 2
- 2m Delta Loop
- Finishing The 6m Delta Loop With 2:1 Balun

