
LCF 214-50 is a 50 ohm low loss coax cable. The cable is 2 1/4″ inches in diameter and designed to be flexible. For its size, it is flexible but it is still quite stiff. The maximum single bend for this cable is 11 inches (280 mm) and for repeated connections a bend of 22 inches (560 mm). At 30 MHz, the loss of this cable is 0.091 dB per 100″ (0.3 per 100 meters) and is capable of 39.7 kW of power.
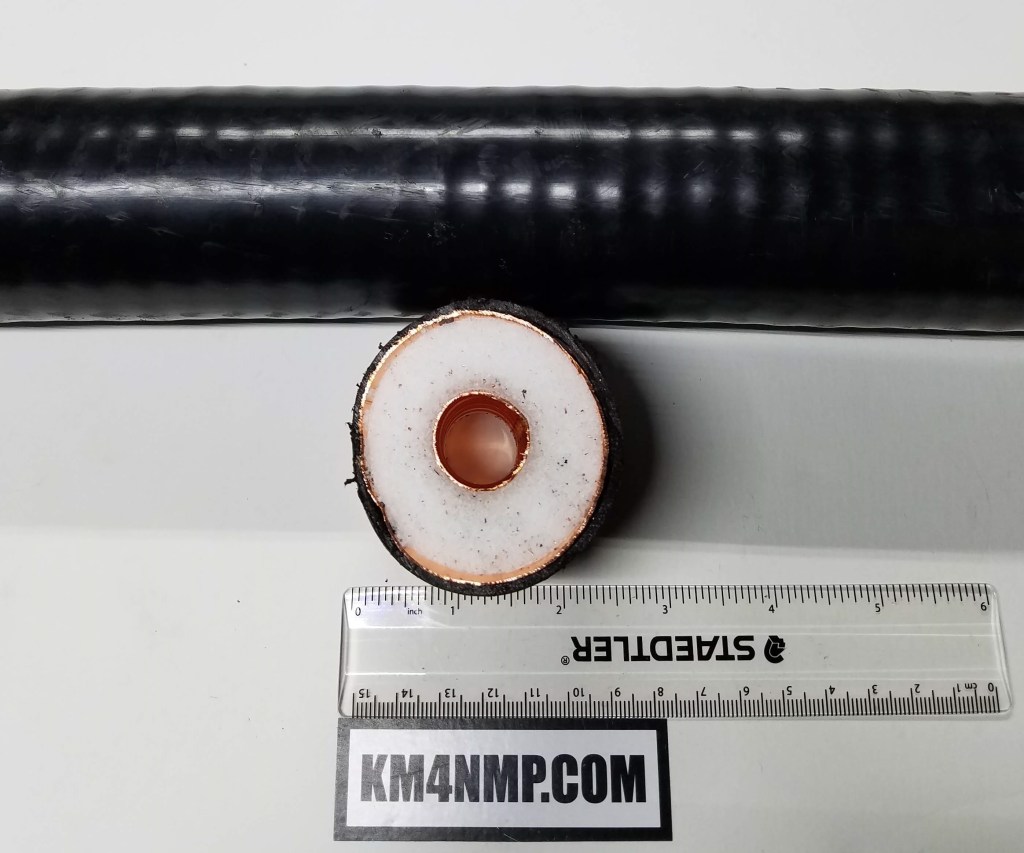
The shield of LCF214-50 is continuous and minimizes interference. The dielectric is designed to transfer heat out of the cable to allow for long term operating at high power levels.


The connectors used in this post are Radio Frequency Systems CONN 716M LCF214-50 and CONN 716F LCF214-50. There is no difference in the termination of the male and female connector.
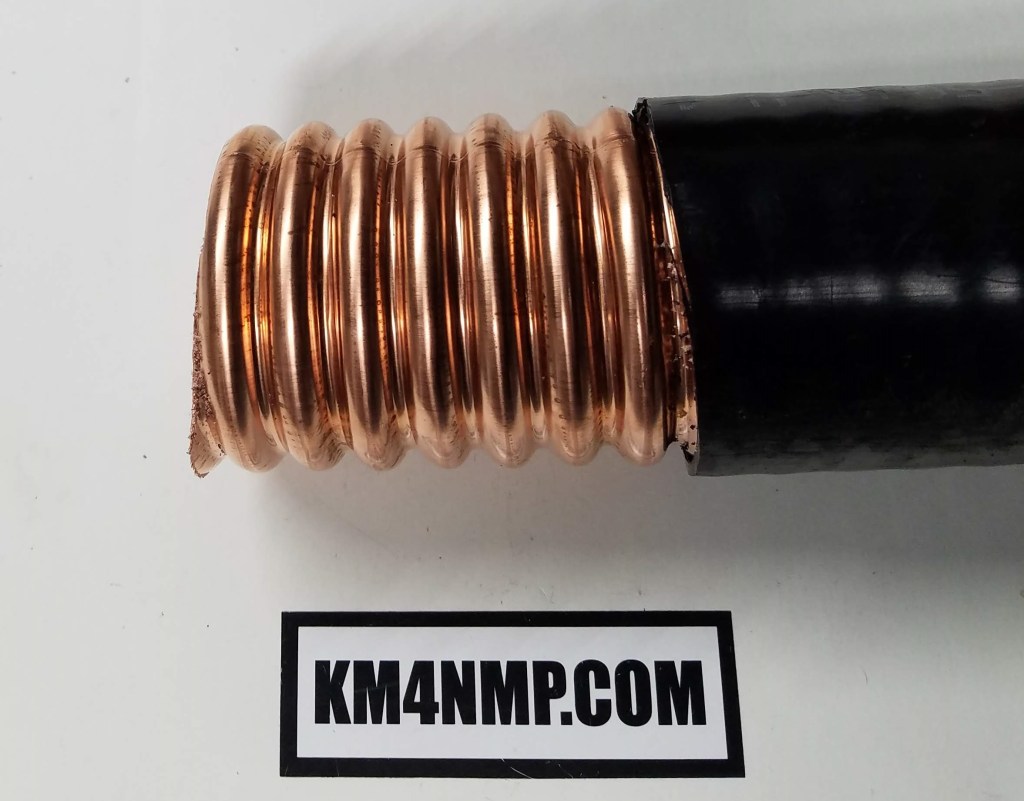
The first step in termination is prepping the cable. Strip the cable back 2 3/4″ (70 mm).

The connector comes with several o-rings. Use the supplied grease to lubricate the o-rings before installation.

The instructions say to place the first o-ring at the second corrugation from the trimmed jacket. I have found in some instances, I had to place it on the first corrugation to get the back nut to fit properly over the jacket of the cable. In these cases, the coax tested fine and this caused no issue.

Lubricate the inside of the back nut and slide it over the o-ring and jacket.

The collet and o-ring will lock the back nut on to the cable. Again lubricate the o-ring.
Put pressure on the back nut and place the collet in the groove in front of the back nut. Put the o-ring over the collet. Pull forward on the back nut and make sure it is tight against the collet. If there is no movement in the back nut and the collet is locked in, proceed to the next step.
Carefully cut the remaining stripped cable flush to the collet with a sharp hack saw. Do not cut into the collet.
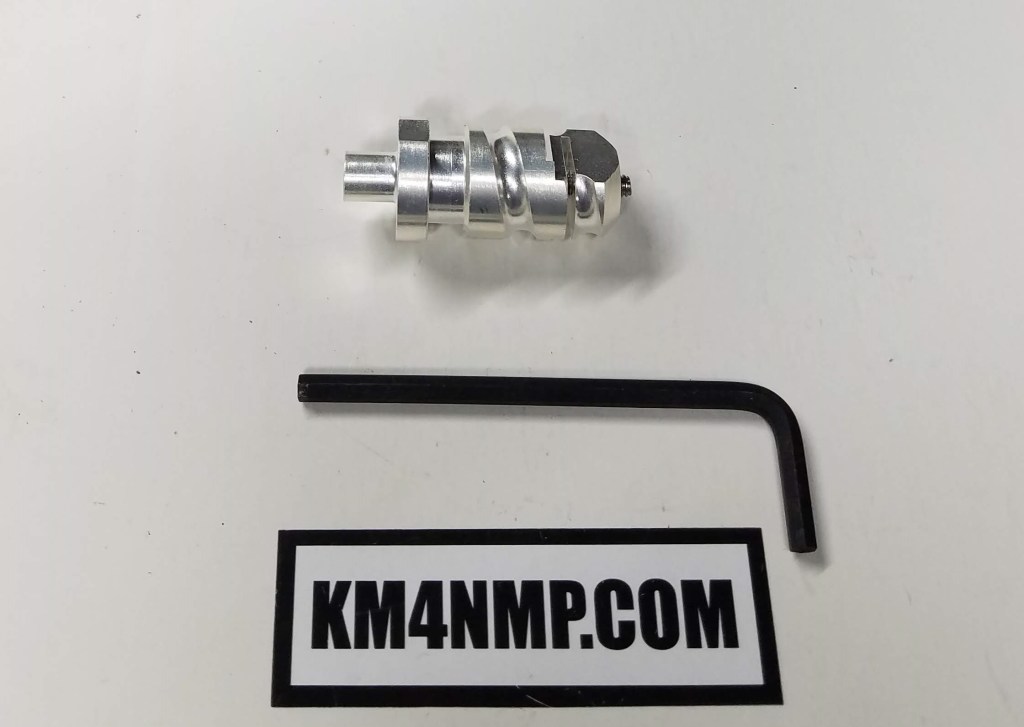
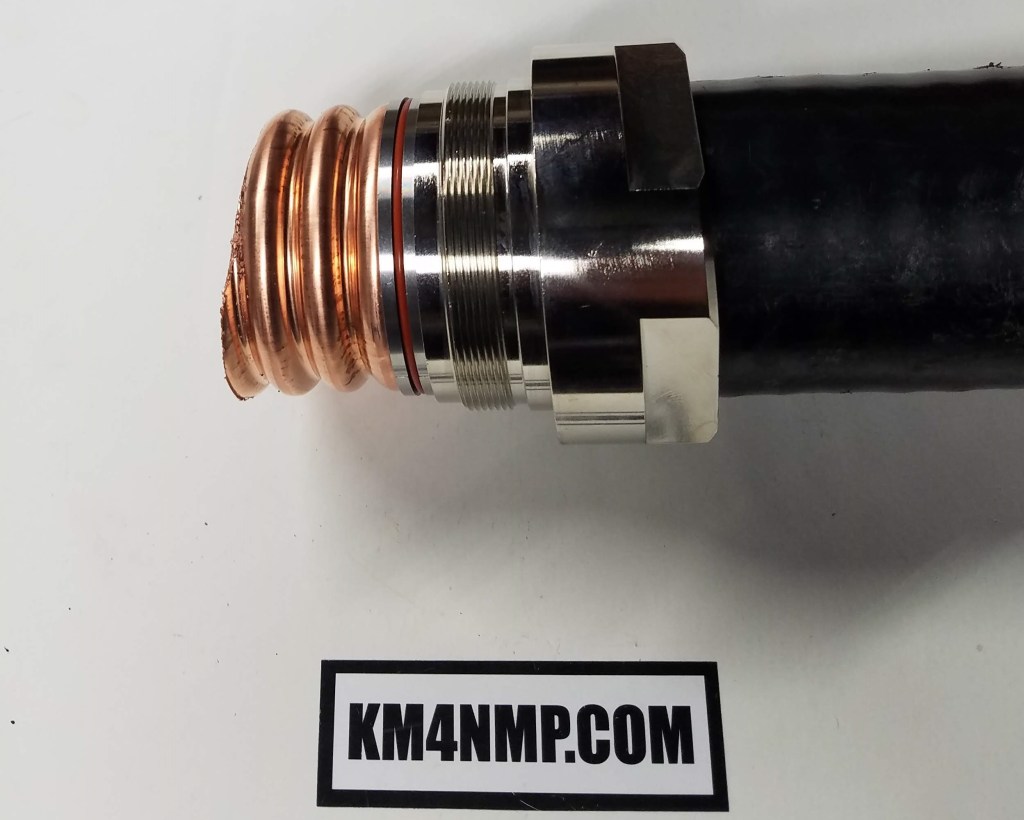
The center conductor pin is installed with a 9/64″ Allen Wrench.

Tighten the center pin until it bottoms out on the face of the cable, do not over tighten. Take a sharp knife and gently separate the dielectric from the outer and inner conductors.

Lubricate and slide the final o-ring over the back nut to the slot at the back of the nut.

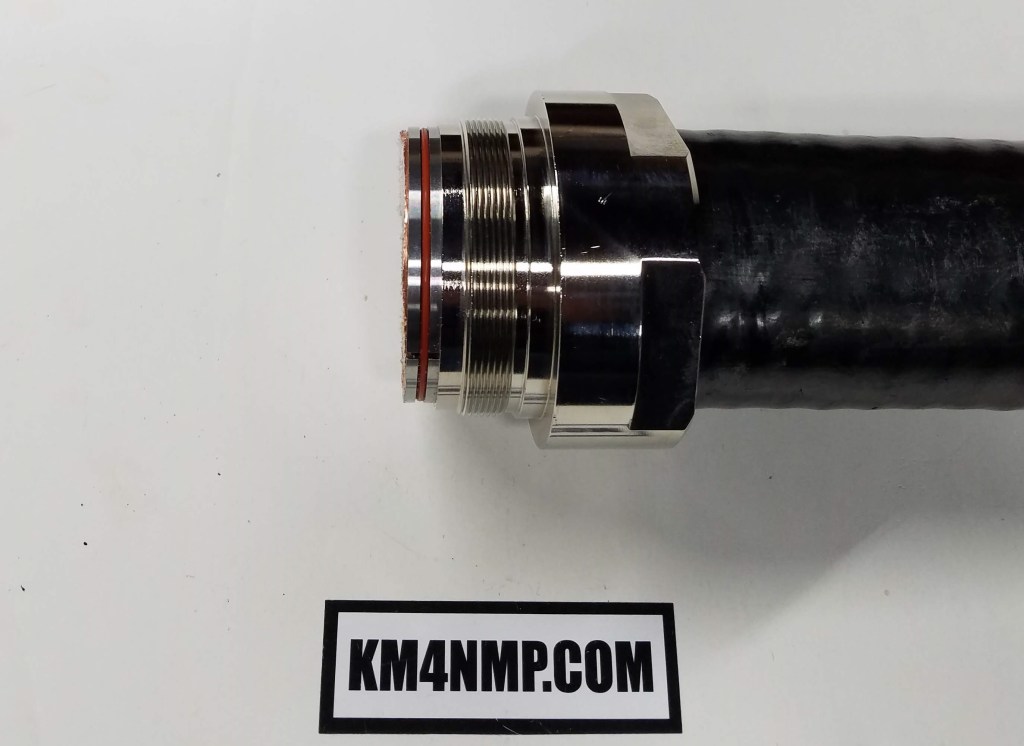
Carefully slide the body of the connector onto the back nut, make sure to line the center conductor pin up. You can feel a slight resistance and it sliding into place. Hold the back nut still and tighten the body with a 2 1/2″ and 2 5/8″ wrenches. Tighten connector to 60 lbf/ft (3 N/m). If done properly the outer conductor will flare and make a nice connection with the body of the connector.
Links
http://products.rfsworld.com//websearchecat/datasheets/?q=LCF214-50JA
https://km4nmp.com/2019/12/07/terminating-lmr-900/
Latest Posts
- 2:1 Balun For 2m/6m
- 1:1 Choke For 2m and 6m
- 2m Delta Loop Ver 2
- 2m Delta Loop
- Finishing The 6m Delta Loop With 2:1 Balun


1 thought on “Terminating LCF214-50”