
The Raspberry Pi is very useful for Amateur Radio; but, it does not have a Real Time Clock built-in. If you are connected to the internet, this is not a problem. When connected to the internet, the Pi will set its time using an NTP server. If there is no connection to the NTP server, the time will be wrong. If you intend on using your Raspberry Pi while operating portable, it will be difficult to sync your time for digital modes.
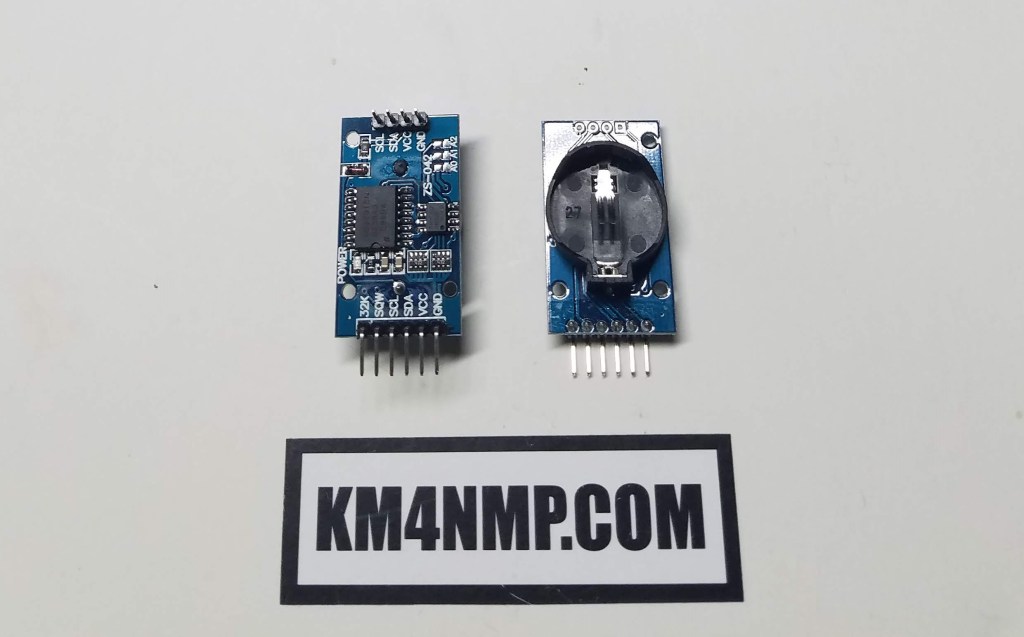
An easy and cheap fix for this is the DS3231 Real Time Clock Module. It is connected using I2C and 5v. SDA is connected to Pi pin 3. SCL is connected to Pi pin 5. Vin is connected to Pi Pin 1. GND is connected to Pi pin 6.
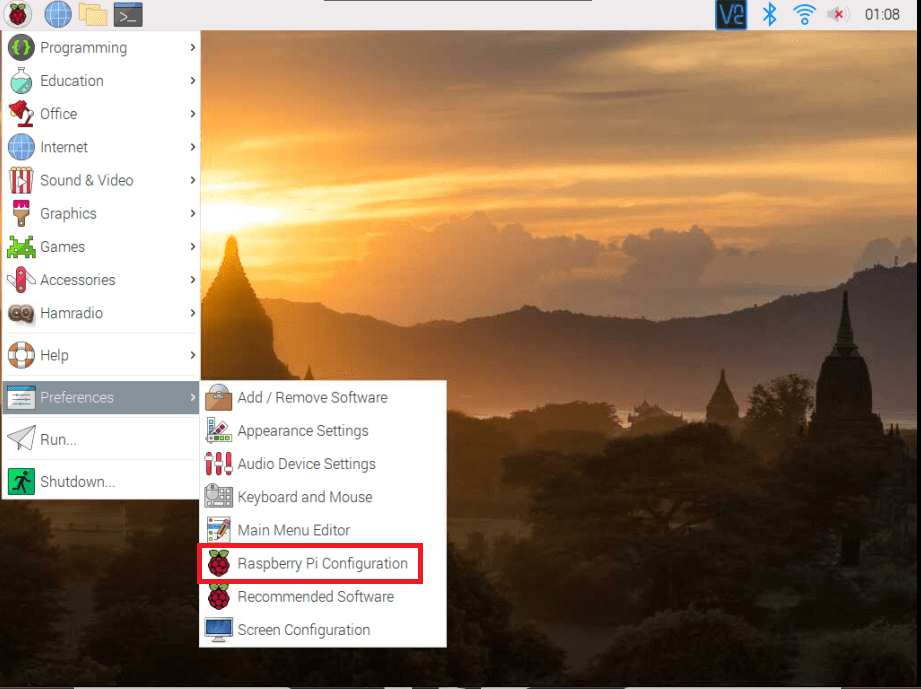
After the DS3231 is wired, Power the Pi up and navigate to Raspberry Pi configuration.

Click on the Interfaces Tab.
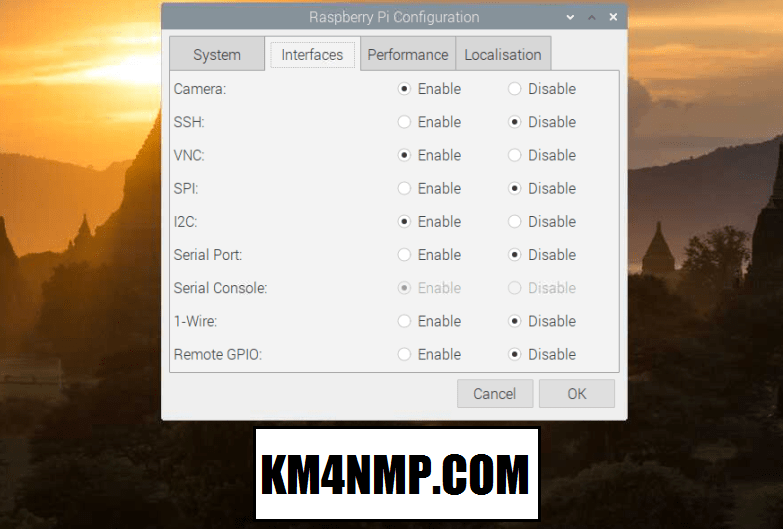
Beside I2C click Enable and OK. Reboot the Raspberry Pi.

To verify the DS3231 is wired properly, we need to install some programs that are capable of detecting the module. To install these tools, type ” sudo apt-get install python-smbus i2c-tools”.
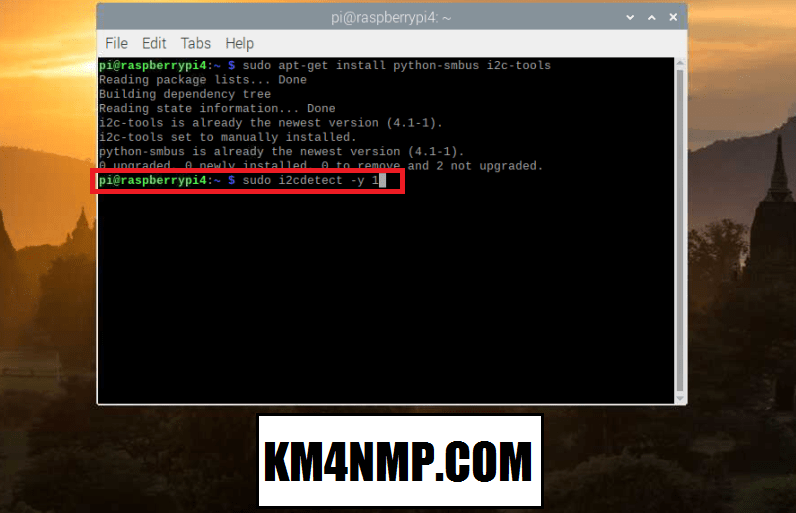
Once installed, type ” sudo i2cdetect -y 1 “. This will search for I2C devices and display their address.

If the RTC is working properly, you should see I2C address 68 detected.

If the previous test was successful, navigate to the boot directory and type “sudo nano config.txt”. This will open the config.txt file in the nano editor.
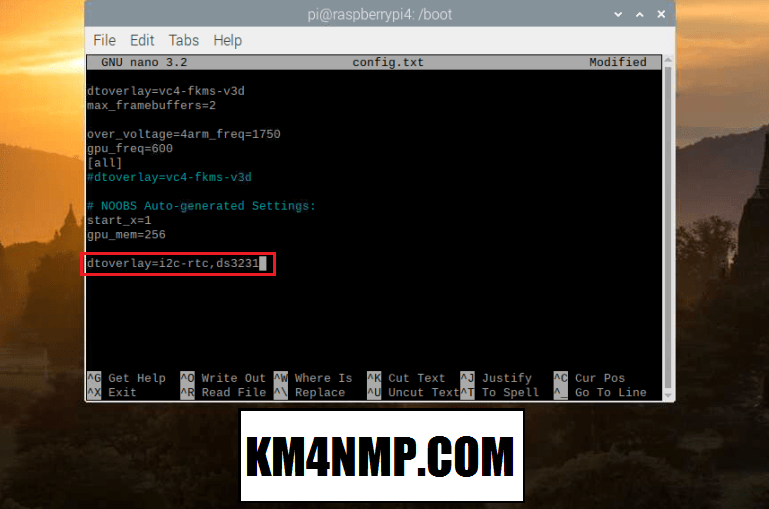
At the bottom of the file add ” dtoverlay=i2c-rtc,ds3231 “. After inserting the line press “Ctrl X” to save the file. Reboot the Raspberry Pi.
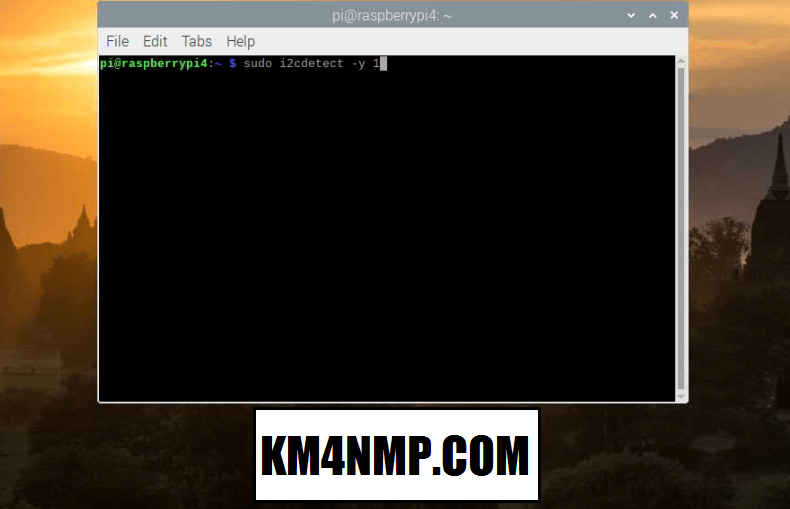
After rebooting, run the i2cdetect too to see if the settings took effect.

If the config.txt file was edited properly, address 68 will now show UU.

Since the Raspberry Pi is now communicating to the DS3231, we can remove the software driven real time clock. Start by typing ” sudo apt-get -y remove fake-hwclock”

Next type ” sudo update-rc.d -f fake-hwclock remove”

Type “cd /lib/udev”. This will change the directory you are in. Once in the udev directory type “sudo nano hwclock-set”. This will open the hwclock-set file in the nano editor.
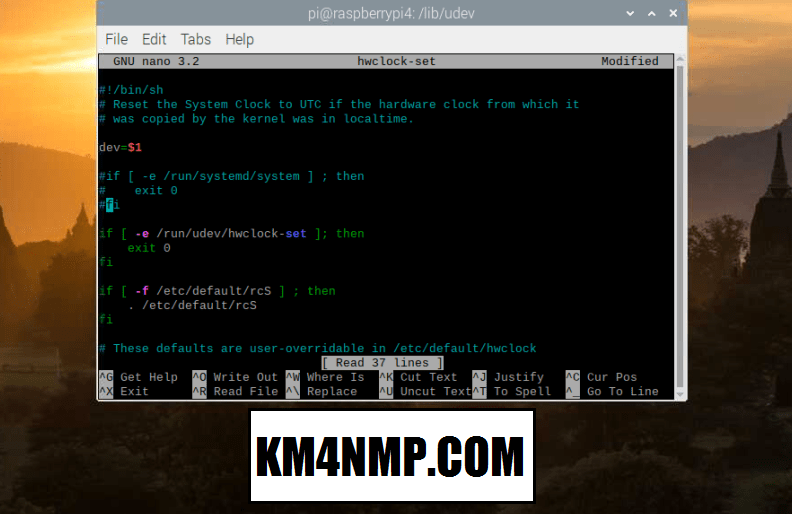
Comment out (place a # at the beggining of the line)lines
” if [ -e /run/systemd/system ] ; then
exit 0
fi”
The picture above, shows the needed changes. Press “Cntrl x” to save and exit.
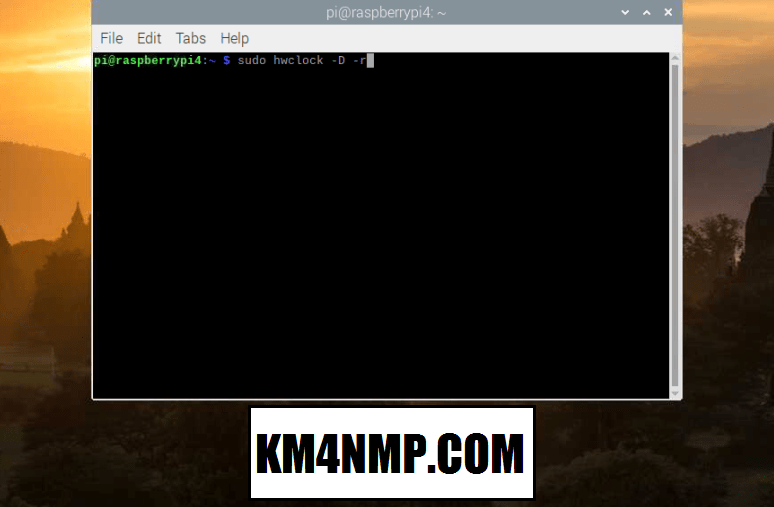
At this point, we should be able to read the time directly from the DS3231. Type “sudo hwclock -D -r”
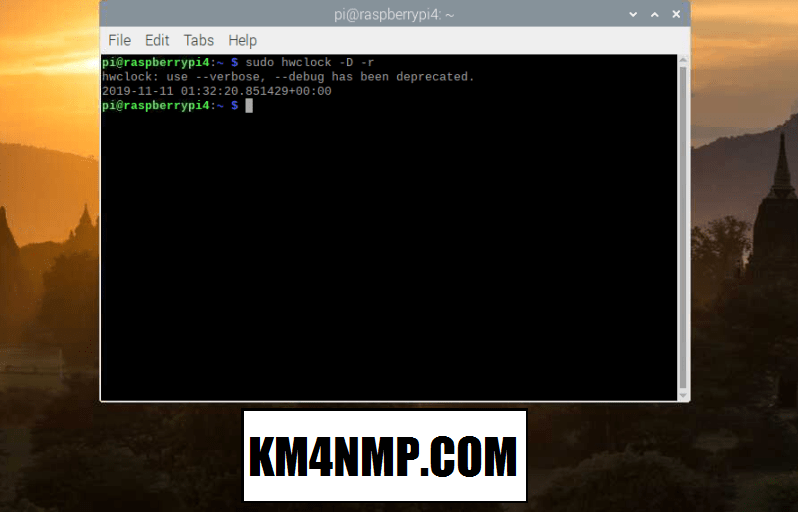
If the RTC has never been set before or the battery is disconnected, the time will be off.

Before we sync the time on the DS3231 verify the date and time the Raspberry Pi is showing is correct. Type “date” in the command line.

If the time and date on the Pi are off connect to the internet .

To sync the DS3231 type ” sudo hwclock -w”

To verify the time was synced to the DS3231 type “sudo hwclock -r”.
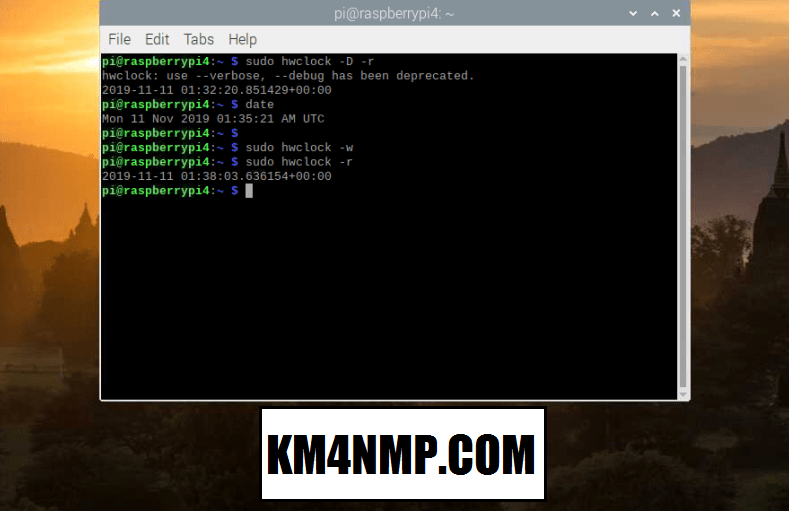
If the time displayed is correct, then your DS3231 RTC module is ready to go. You can now boot your Raspberry pi without the internet and the time will be correct.
Links
https://km4nmp.com/2019/11/17/installing-teamviewer-on-the-raspberry-pi/
https://km4nmp.com/2019/11/10/how-to-enable-vnc-for-your-raspberry-pi/
https://km4nmp.com/2019/11/09/backing-up-the-raspberry-pi-sd-card/
https://km4nmp.com/2019/11/03/loading-raspian-on-the-new-raspberry-pi-4-b/

Latest Posts
- 2:1 Balun For 2m/6m
- 1:1 Choke For 2m and 6m
- 2m Delta Loop Ver 2
- 2m Delta Loop
- Finishing The 6m Delta Loop With 2:1 Balun


Thanks! 1 change needed: FROM: “sudo hwclock -D -r” TO: “sudo hwclock –verbose -r”
LikeLike