
SSTV is a fun mode to play with; so, I decided to load it on the Raspberry Pi 4. A free program to send and receive SSTV with the Pi is QSSTV. Installing QSSTV has several steps. First, download QSSTV. Make a directory named QSSTV and place the file in it. There are a couple programs QSSTV is dependent on; so, next we will install them.

In the command line, type “sudo apt-get install g++ libfftw3-dev qt5-default libpulse-dev”. Wait until proccess is done and move to the next step.

Type “sudo apt-get install libhamlib-dev libasound2-dev libv4l-dev”.

Type “sudo apt-get install libopenjp2-7 libopenjp2-7-dev”. Each step may take some time depending on you internet connection; so, be patient.

Next, navigate to the directory were you saved the QSSTV file. Mine was left in the download folder.

Once you are in the proper directory, type ” tar -xvzf qsstv_9.4.4.tar.gz”. This will unpack the QSSTV; so, we can install it.

While unpacking, another directory will be made with QSSTV files inside it. Change to that directory.

Type “qmake”.

Type “make”.

Finally, to install QSSTV, type “sudo make install”.
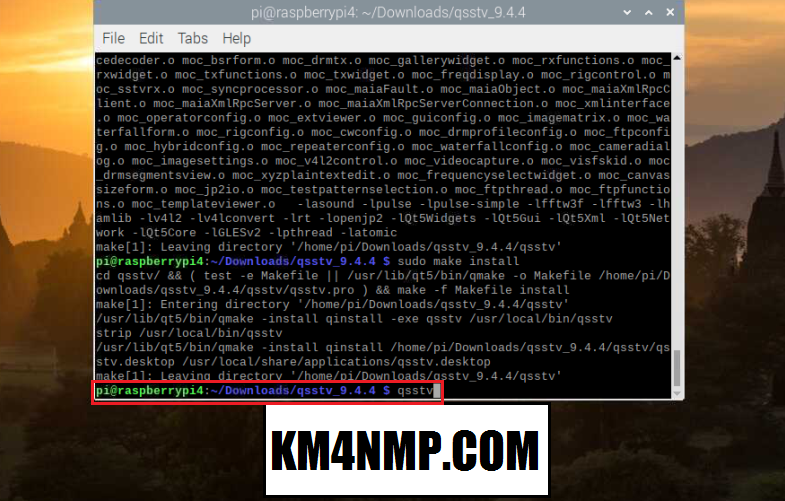
After the Raspberry Pi is done installing QSSTV, it is ready to open. Type “qsstv” and the program will open. To make it easier to open, I have added an icon in the applications menu.

For testing purposes, the Raspberry Pi’s sound card is connected to the sound card of the PC used for sending SSTV. If you do this, make sure to set the volume very low on both sound cards and adjust it up as needed. This is very useful for testing.

After selecting the sound inputs and outputs, I was able to receive a picture. The image received had quite a bit of slat. This is not to surprising since QSSTV has not been properly calibrated yet.

QSSTV has an auto slant feature that will automatically take the slant out of a received picture. This is a nice feature; but, not a replacement for calibrating QSSTV. In later posts, we will good further into calibration.
Links
http://users.telenet.be/on4qz/index.html
https://km4nmp.com/2019/11/23/a-real-time-clock-for-the-raspberry-pi/
https://km4nmp.com/2019/11/03/loading-raspian-on-the-new-raspberry-pi-4-b/
https://km4nmp.com/2019/11/09/backing-up-the-raspberry-pi-sd-card/
Latest Posts
- 2:1 Balun For 2m/6m
- 1:1 Choke For 2m and 6m
- 2m Delta Loop Ver 2
- 2m Delta Loop
- Finishing The 6m Delta Loop With 2:1 Balun


The Download Link to http://users.telenet.be is not valid any more
LikeLike